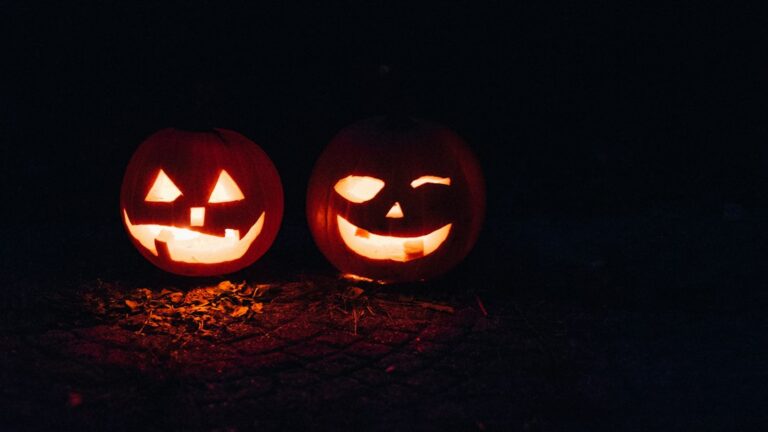
10 Scary Pumpkin Carving Ideas to Haunt Your Halloween
Scary Pumpkin Carving Ideas for a Haunted Halloween Porch
For a creepy porch display, try a fang-toothed monster, bat silhouette, hollow-eyed tree, Grim Reaper, or zombie with an exposed brain. Start with a simple cutout if you’re new to carving. For a more detailed design, leave solid strips of pumpkin rind between openings so the face stays intact.
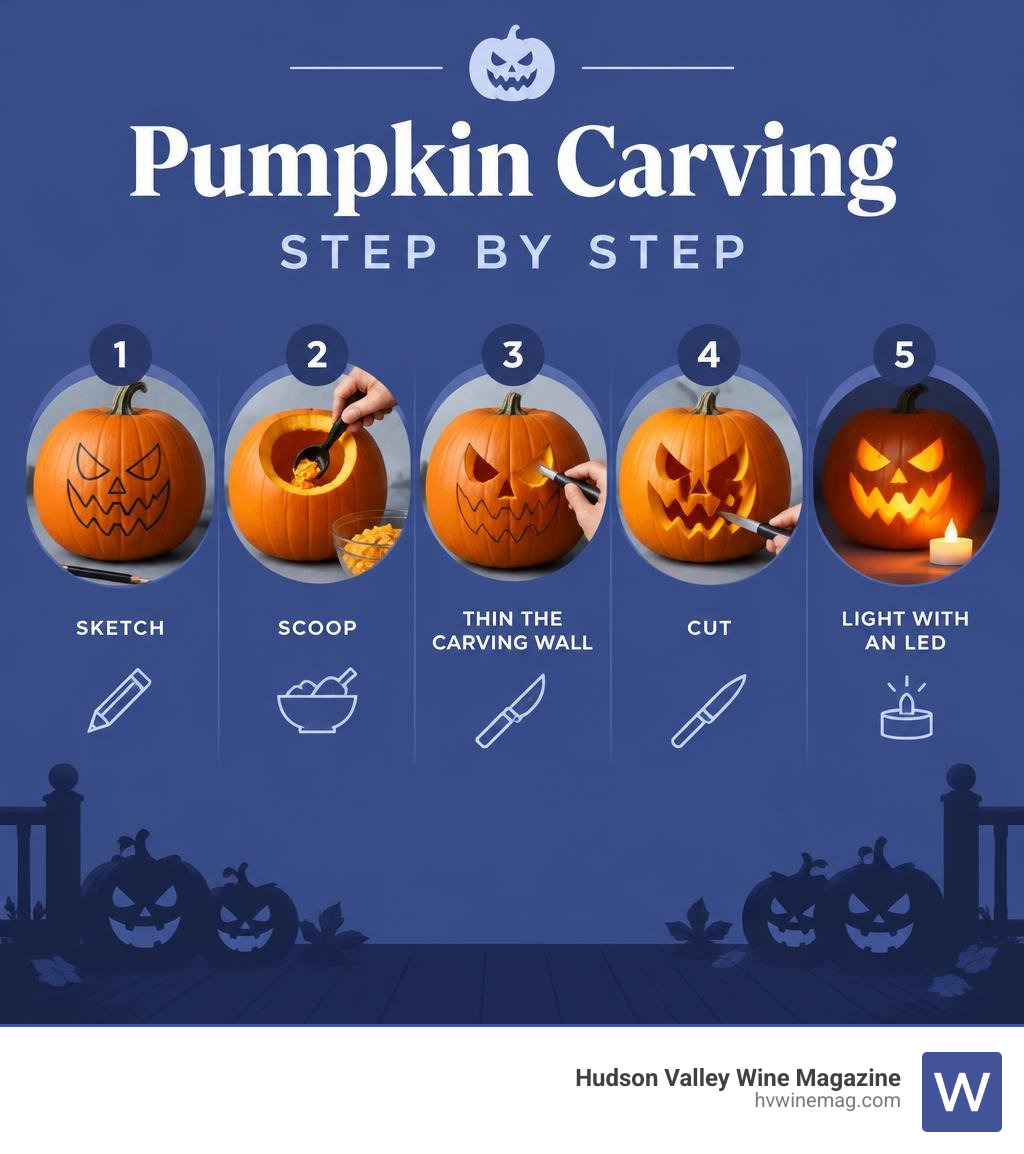
Sketch your design before cutting, scoop out the pulp, and use a battery-powered LED to make the shadows glow. The ten ideas below range from quick scares to carvings that reward a steady hand.
Related content about scary pumpkin carving ideas:
The Best Scary Pumpkin Carving Ideas for a Haunted Porch
As October 2026 rolls in across the Hudson Valley, harvest season reaches its peak. Crisp autumn evenings call for local craft cider, spiced mulled wine, and the timeless tradition of turning fresh farm gourds into terrifying masterpieces. Creating a standout porch display does not require professional sculpting credentials. It just takes the right concept, smart planning, and an understanding of how light interacts with negative space.

When selecting motifs for a horror-inspired display, we love focusing on high-contrast designs that cast sharp, dramatic silhouettes across dark front walkways. Whether you are aiming for classic gothic horror or gruesome, monster-inspired visuals, these concepts provide endless inspiration:
- Cannibalistic Gourds: A monstrous, wide-mouthed pumpkin devouring a smaller, terrified mini pumpkin whole.
- Classic Horror Silhouettes: Flying vampire bats, wicked witch profiles, and graveyard headstones framed by glowing full moons.
- Gnarled Forest Phantoms: Distorted, screaming trees with hollow eyes and twisting root networks.
- Predatory Demons: Piercing slit eyes reinforced with central rind bars and jagged fangs.
- The Grim Reaper: Hooded skeletal figures wielding glowing scythe blades.
- Grotesque Zombies: Distorted faces featuring exposed brain lobes and uneven, rotting teeth.
- Flame-Framed Monsters: Dramatic, asymmetrical jaws bordered by teardrop flame cuts that flicker in the dark.
- Radiant Nightmares: Terrifying monster grins paired with diamond cheek perforations that cast scattered pinpoints of light.
- Spooky Swamp Creatures: Sunken eye sockets with deep relief-shaded textured bark skin.
- Bite-Mark Specters: Pumpkins styled with jagged, faux puncture wounds, dripping accents, and toothpick fangs.
Beginner-Friendly Scary Pumpkin Carving Ideas
You do not need years of sculpting experience to craft a terrifying jack-o’-lantern. Beginner-friendly designs rely on bold silhouettes, clever props, and strong contrast rather than microscopic detail work.
1. The Cannibal Pumpkin (Pumpkin-Eating-Pumpkin)
This design is a perennial favorite because it tells an instant, comedic-horror story with minimal carving effort.
- How to create it: Carve an oversized, jagged mouth into a medium or large pumpkin. Make the opening wide enough to fit a miniature orange pumpkin inside.
- The scary details: Carve a tiny, terrified face (two wide circular eyes and a small, screaming “O” mouth) into the mini gourd. Wedge the mini pumpkin between the larger pumpkin’s upper and lower jaws. Add toothpicks into the gums of the larger pumpkin to act as needle-sharp teeth biting down into the victim.
2. The Vampire Bat & Haunted Moon Silhouette
Silhouette designs are remarkably forgiving because you are carving around the subject rather than executing delicate internal facial features.
- How to create it: Trace a large circular moon onto the pumpkin face. Inside the circle, draw the silhouette of a swooping vampire bat with jagged wing tips and pointed ears.
- The scary details: Instead of cutting out the bat, cut out the negative space of the moon around it, leaving the solid bat shape intact. When illuminated from behind, the bat stands out as an ominous black shadow against an intense, glowing amber orb.
3. Wicked Witch Shadow
Similar to the bat silhouette, this design uses sharp, recognizable angles that catch the eye from the street.
- How to create it: Sketch a classic witch profile featuring a crooked nose, pointed chin, and tall, angular hat.
- The scary details: Cut out the background negative space so the witch’s profile casts a dramatic shadow across your front steps. You can use a linocut tool to lightly scratch flying bats or a crescent moon into the remaining solid rind.
4. The Gnarled Woodland Phantom
If you want to blend nature and gothic horror, the Hollow-Eyed Haunted Tree Pumpkin Carving Idea is an exceptional concept.
- How to create it: Sketch a twisted, leafless tree whose branches spread widely across the face of the pumpkin. Center the trunk, giving it a distorted, screaming face.
- The scary details: Use relief shading to scrape the skin off the background, letting a soft glow shine behind the branches. Then, cut all the way through the rind for the hollow eyes and mouth. This two-layer lighting effect creates an eerie optical illusion that looks remarkably advanced while remaining very approachable.
5. Quick Toothpick-Fang Monster
When you are short on time, props can elevate a standard jack-o’-lantern into a terrifying creation in minutes.
- How to create it: Carve a wide, slanted grimace or sneer with completely flat gum lines (no carved teeth).
- The scary details: Press round wooden toothpicks or carved raw potato wedges directly into the top and bottom rims of the mouth. The sheer quantity of irregular, needle-like teeth turns a basic cutout into a predatory nightmare.
Advanced and Complex Scary Pumpkin Carving Ideas
For seasoned carvers looking for intricate, show-stopping centerpieces, these advanced concepts incorporate structural engineering, negative-space planning, and multi-depth relief carving.
6. Barred-Eye the Toothy Demon
Predatory slit eyes and menacing horns make the Barred-Eye the Toothy Demon Pumpkin Carving Idea a standout intermediate-to-advanced project.
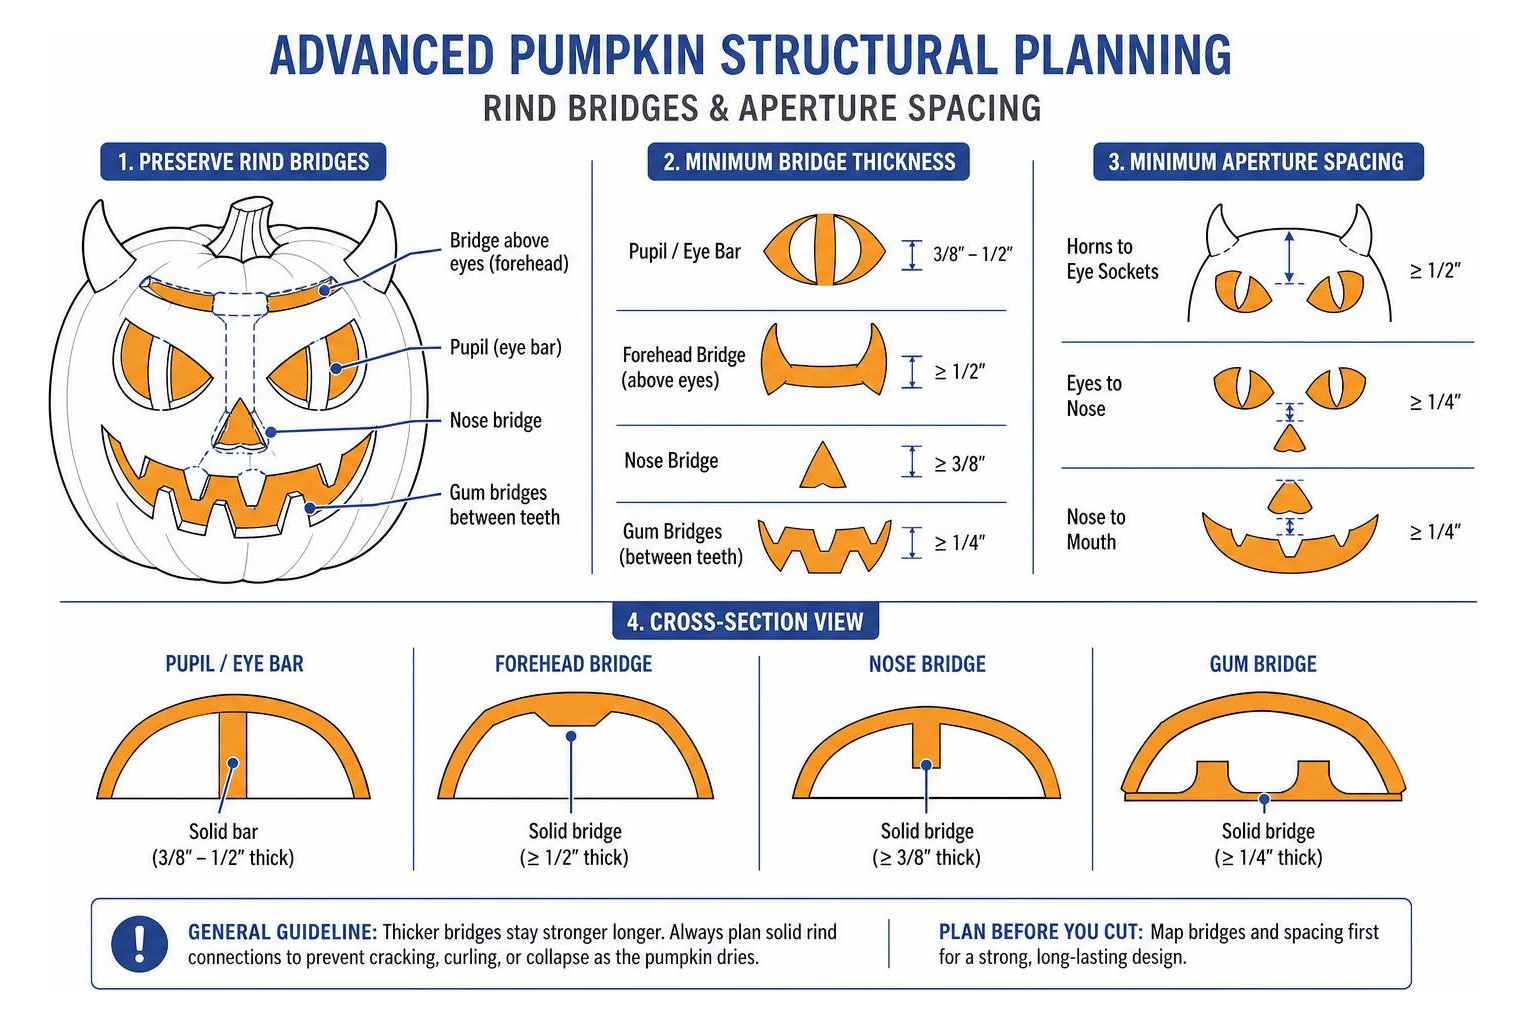
- Structural design: The defining feature of this build is the solid vertical bar running through each eye socket, mimicking a reptile’s predatory slit pupil.
- Execution tip: Keep these pupil bars between 3/8-inch and 1/2-inch thick. If they are cut too thin, the rind will dry out, curl, and snap. Always leave at least half an inch of intact rind between the horn cutouts above and the eye sockets below to prevent the forehead from collapsing.
7. Scythe Shadow the Grim Reaper
Skeletal silhouettes combined with weapon arcs create an unmistakable horror icon with the Scythe Shadow the Grim Reaper Pumpkin Carving Idea.
- Structural design: This carving features two distinct visual zones: the hooded skull face on one side and a sweeping scythe on the other.
- Execution tip: The long, curved aperture of the scythe blade must remain completely separate from the scythe shaft. Maintain a solid rind bridge of at least 3/8-inch between the blade and shaft. For the reaper’s hood, add 3 to 4 evenly spaced rind breaks along the outline to anchor the face firmly to the outer pumpkin wall.
8. Flame-Bordered Monster Mouth
If you want your pumpkin to look like it is breathing hellfire, the Flame-Bordered Monster Pumpkin Mouth Pumpkin Carving Idea offers an incredible lighting trick.
- Structural design: This design features an asymmetrical, snarling maw lined with jagged fangs, surrounded by an outer ring of teardrop, flame-shaped perforations.
- Execution tip: Cut the flame apertures with narrow bases and wider tops. This specific geometry forces interior light upward in teardrop blooms, creating a dynamic, flickering fire effect. Break this complex carving over two days: cut the mouth and fangs on day one, refrigerate the pumpkin overnight, and carve the delicate outer flame borders on day two to avoid moisture fatigue and cracking.
9. Brainy the Barred-Eye Zombie
Grotesque, high-density detail defines the Brainy the Barred-Eye Zombie Pumpkin Carving Idea.
- Structural design: Featuring multiple supported eye bars, crooked tooth roots, and curving cranial cutouts that mimic exposed brain matter, this design treats the pumpkin wall as an interconnected load-bearing lattice.
- Execution tip: Because this pattern removes significant rind surface area, every structural bridge between the brain lobes must measure at least 1/2-inch wide. Use a thin, flexible detail blade and carve each brain curve in one smooth, continuous stroke to prevent micro-tears in the flesh.
10. Sparklecheek the Barred-Eye Monster
For a balanced mix of menacing facial structure and ambient lighting tricks, try the Sparklecheek the Barred-Eye Monster Pumpkin Carving Idea.
- Structural design: This creature pairs barred slit eyes and forehead slash accents with eight individually rooted fangs and geometric diamond cheek cutouts.
- Execution tip: Number each tooth lightly with a washable marker before making any cuts. Carve all root boundaries across the gums first before shaping individual sharp tips. The diamond cheek apertures scatter multi-point light patterns across your porch floor, contrasting beautifully with the linear shadow bars of the eyes.
Essential Tools and Advanced Carving Techniques
Achieving clean, professional cuts on complex scary designs requires moving past flimsy plastic grocery store kits. Investing in the right tools gives you complete control over line weight, depth, and structural stability.

The Master Carver’s Tool Kit
- Heavy-Duty Scraper Scoop: A wide, rigid metal scoop or large clay loop tool allows you to scrape interior strings and thin the carving wall down to an even 3/4-inch to 1-inch thickness.
- Fine-Point Serrated Saws: Small, narrow keyhole saws provide the agility needed to cut tight corners and sharp tooth roots without tearing adjacent flesh.
- Linocut and Clay Loop Gouges: U-shaped and V-shaped linoleum cutters are essential for relief carving, peeling away the orange outer skin while leaving translucent pulp behind to catch internal light.
- Rotary Tools (Dremel): Fitted with sanding drums or high-speed cutters, rotary tools make quick work of background etching, textured skin shading, and circular hole boring.
- Washable Water-Based Markers: Always sketch designs with red or green washable markers. Avoid permanent black ink, which bleeds into the pumpkin flesh and leaves unsightly stains on finished displays.
Mastering Structural Bridges and Relief Shading
When executing intricate horror designs, negative space (cutouts) removes structural support. Follow these expert guidelines:
- Map Load-Bearing Bridges Early: Before making a single cut, identify your connecting rind bridges. Keep structural bridges at least 1/2-inch wide on dense designs like zombies or skeletal faces.
- Cut from the Center Outward: Always carve the smallest, most central details first (such as pupils, fangs, and inner nostrils) before tackling large exterior perimeter cuts. This keeps the pumpkin wall rigid while you apply cutting pressure.
- Use Continuous Arc Cuts: When carving organic shapes like brain lobes or curved scythes, enter the cut at one angle and follow the curve in a single continuous stroke. Reversing your blade direction mid-cut introduces micro-fissures that cause features to sag within 48 hours.
How to Preserve, Paint, and Light Your Creepy Jack-o’-Lantern
A well-carved scary pumpkin can lose its terrifying charm if it wilts or collapses before Halloween night. Combining proper moisture preservation, mixed-media decorative techniques, and modern illumination ensures your display stays fresh and frightening throughout the season.
Preservation: Stopping Mold and Dehydration
Pumpkins rot due to two primary culprits: bacterial mold and moisture loss. You can significantly extend your carving’s lifespan with these proven steps:
- Vinegar Sanitization Mist: Once fully gutted and carved, submerge the pumpkin in a solution of one part white vinegar to four parts water for 15 minutes (or spray it thoroughly inside and out). Vinegar naturally eliminates surface bacteria and fungal spores without damaging the rind.
- Petroleum Jelly Edge Sealing: Coat all exposed, raw cut edges with a thin layer of petroleum jelly. This creates a moisture barrier that locks hydration inside the cell walls, preventing teeth and eye bars from shriveling and cracking. Reapply every two to three days.
- Cool Storage: Keep carved pumpkins in a shaded, well-ventilated area. If unseasonably warm weather strikes, bring your carvings indoors or store them in a cool garage overnight.
Combining Carving with Painting and Props
You can amplify the scare factor of your jack-o’-lanterns by integrating mixed media. Painting the exterior rind matte black creates an intense, gothic contrast that makes interior glowing orange features pop with heightened drama.
If you are looking for non-traditional textures or want to create complementary no-carve pieces for your porch, explore these 30 creative pumpkin painting ideas for fall fun to mix painted monsters alongside your carved lanterns. Adding elements like fake blood dripped along tooth roots, dry ice placed inside a water-filled glass interior for smoky breath, or faux spiderwebs stretched across hollow eyes takes your porch display to a whole new level.
Lighting: Choosing the Right Illumination
Lighting dictates the mood of your display. While traditional candles offer nostalgic appeal, modern battery-operated LEDs and special effects hardware provide superior safety and visual versatility.
| Illumination Type | Visual Effect | Longevity | Heat & Structural Risk | Best Used For |
|---|---|---|---|---|
| Traditional Wax Tealight | Warm, natural flickering flame | 2–4 hours | High heat dries interior flesh rapidly; fire hazard | Simple, thick-walled classic cutouts |
| Warm-White Battery LED | Steady, bright golden amber glow | 24–48+ hours | Zero heat; preserves rind moisture completely | Intricate carvings, thin relief walls, barred eyes |
| Color-Changing / Red LED | Eerie, blood-red or spectral glow | 20–40 hours | Zero heat; completely safe for delicate bridges | Zombies, demons, and monster mouths |
| Submersible LED + Dry Ice | Glowing fog rolling out of mouth/eyes | 1–2 hours (fog) | Cold moisture actively hydrates interior walls | Halloween party centerpieces and photo shoots |
Frequently Asked Questions About Scary Jack-o’-Lanterns
How do I make my carved pumpkin last longer without rotting?
To maximize longevity, thoroughly scrape out every trace of interior pulp and seeds, as moist strings attract mold quickly. After carving, mist all surfaces with a diluted white vinegar solution to eliminate bacteria, and seal every exposed cut edge with petroleum jelly to prevent dehydration. Finally, use battery-operated LED lights instead of wax candles, as heat from open flames cooks the pumpkin flesh and accelerates rot.
What is the easiest way to carve sharp monster teeth?
The simplest way to create clean monster teeth is to lightly score the outline of the gums first with a washable marker, numbering each tooth from left to right. Cut all root boundaries across the mouth before narrowing individual tips. If you want ultra-sharp needle fangs without delicate carving, simply carve a flat-rimmed open mouth and press sharp wooden toothpicks or carved raw potato wedges directly into the gums.
Which lighting creates the scariest glowing pumpkin effect?
For the scariest lighting effect, use high-output flickering amber or deep-red LED lights positioned close to the base of the pumpkin. If your design features asymmetrical cuts or flame borders, flickering LEDs cast dynamic, shifting shadows across nearby walls. Adding a small cup of warm water with a pellet of dry ice inside the pumpkin will send dense, glowing fog pouring through the eyes and mouth for an unforgettable haunted effect.
Conclusion
Halloween in the Hudson Valley is all about celebrating the autumn harvest, gathering with friends, and embracing the eerie folklore of our historic river towns. Whether you are crafting a simple toothpick-fanged monster with the family or sculpting a complex, flame-bordered demon for a neighborhood competition, taking your time with layout planning and structural bridges guarantees a stunning porch display.
After finishing your carving session, keep the festive spirit going by exploring our regional harvest celebrations. Pair your fall festivities with a visit to local cideries like the Angry Orchard Cider House to enjoy fresh, locally crafted seasonal ciders. Grab your scoops, map out your bridges, and start carving your creepiest Halloween display today!